What App Has Diffrent Colors and Art in Your Comment Box on Facebook
Welcome dorsum! In this part of the tutorial we're going to be coding our pattern into HTML and illustrating some of Facebook's CSS fashion properties that will give it that native feel. So stick with me, make yourself a loving cup of tea and happy coding!
Introduction
Welcome to part 2 of our design and code a native Facebook app. In the last article we looked behind the scenes at some of the idea processes involved with creating a native look and feel Facebook app. Although we didn't go into great item about the actual design of information technology in Photoshop; we did hash out how Facebook's design principles can help you with designing your app. For my example I chose to recreate the webdesigntuts+ weblog as a Facebook app. I'm presuming that you are all comfortable plenty in Photoshop to have either replicated it or tailored it to create your own native wait and feel design.
What Nosotros'll be Creating


In this role of the tutorial we're going to be coding that design into HTML and illustrating some of Facebook's CSS style properties that will requite it that native feel. So stick with me, brand yourself a loving cup of tea and happy coding!
Step 1: Failing to Ready is Preparing to Fail
It's always a good idea to begin with a bit of forward planning. Some of yous will desire to design your layout in Photoshop whilst some of you who are confident plenty volition want to bound straight from the wireframe into the HTML/CSS marking up. Personally I e'er like to create what I am going to be coding into Photoshop kickoff equally information technology gives me a strong visual thought as to what I am going to exist coding. It can as well come up in handy in the future for when you want to update your app. It can be much easier to accommodate and anticipate things in Photoshop than it can be in your code editor.
Sometimes I also similar to print out my wireframe and marking the dimensions on them with a pen. This too makes life easier when I'grand coding things up. Every bit you lot become along I'm sure you will come upwards with your ain methods and ways of doing things and a part of it is finding the best way that suits you.
Step 2: App Structure


The way I have my folder structured is as follows (and this is pretty much my standard way of setting things up for every project). You can save yourself a lot of time by simply creating this bare binder template on your hard drive and copying it every time y'all create a new project
- css
- js
- images
- index.html
Step 3: HTML Markup
<!DOCTYPE HTML> <html> <caput> <meta charset="utf-viii"> <title>Blueprint and Code an integrated Facebook App</championship> <link rel="stylesheet" type="text/css" href="https://yui.yahooapis.com/iii.3.0/build/cssreset/reset-min.css"> <link rel="stylesheet" type="text/css" href="css/style.css"> <script src="http://code.jquery.com/jquery-latest.js" type="text/javascript"></script> <script src="js/myjava.js" blazon="text/javascript"></script> </head> <body> </torso> </html>
Setting Up our Includes
For this project I've used the HTML5 doctype, which I think nigh of you lot should have tried out by at present. For my CSS reset I've linked to Yahoo's CSS reset from their YUI library. If you're not familiar with a CSS reset, in its well-nigh bones form information technology can be described as:
a stylesheet to reduce browser inconsistencies in things similar default line heights, margins and font sizes of headings etc
I'm not going to go into too much detail nearly this in this tutorial simply you can find more information regarding this in the farther reading department below.
After the reset I've then linked to my own CSS file which I've named 'fashion.css'. I've then followed this past the latest include of jQuery and an include to my ain javascript file which I have named 'myjava.js' (although we will be creating this file in the side by side office of the tutorial). This file will permit us to do our filter search and change the content of our page tabs
Setting Up Our Folio
<trunk> <div class="wrapper"> <div class="maincontent"> <div class="tab_container"> </div><!--Cease Tab Container --> </div><!--End Main Content--> <div form="sidebar"> </div><!--End Sidebar--> </div><!--Terminate Wrapper --> </body>
Whilst creating the html version of our Facebook app I'd like to put everything in a wrapper that is 760px broad. This is simply to ensure that I'm staying within 760px; the width of the canvas that Facebook allows your app to sit down in. I so remove this wrapper and the CSS for it before I put it into Facebook.
In one case we've setup our includes and 'wrapper' it'due south and so fourth dimension to motion onto the main building blocks of our app. In this example it's relatively simple as we only take the 'maincontent' and the 'sidebar' divs. To this nosotros'll employ classes of the same name. You could, if you lot wanted, apply 'id's' instead of 'classes' every bit these div instances will not be repeated. Still, something, which I always opt for (although I'k certain some would disagree) is to utilize classes on most items. I rarely use id's. I discover that by doing this it just keeps it elementary for me. I never have to wonder whether I've given something an 'id' or a 'class'. This tin come in remarkably handy especially when you start to incorporate jQuery into your apps. Although exercise consider whether it is feasible before you start coding that yous definitely will not need to use id'southward anywhere.
Information technology'southward besides advisable to ever terminate your markup blocks with a endmost comment stating which part of the markup has finished. This fashion you know where each section ends. I must admit I was pretty late at adopting this technique and in hindsight I could take saved myself many hours of having to wade my way through heaps of code trying to find out where sure blocks begin and end.
Stride 4: Chief Content


<div class="maincontent"> <div class="logo"><img src="images/logo.png" width="379" height="60" alt="webdesigntuts+ logo"></div> <ul class="tabs"> <li><a href="#tab1">All</a></li> <li><a href="#tab2">About</a></li> <li><a href="#tab3">Write For Us</a></li> <li><a href="#tab4">Other Blogs</a></li> </ul> <div class="tab_container"> <div id="tab1" grade="tab_content"> <div class="post"> </div><!--End Weblog Post--> <div class="post"> </div><!--End Blog Mail--> </div><!--End Tab 1--> <div id="tab2" course="tab_content"> </div><!--End Tab ii --> <div id="tab3" class="tab_content"> </div><!--Terminate Tab iii --> <div id="tab4" class="tab_content"> </div><!--Finish Tab 4 --> </div><!--End Tab Container --> </div><!--End Main Content--> <div course="sidebar"> </div><!--Cease Sidebar--> </div><!--End Wrapper -->
For this app I didn't remember it was necessary to use a header just to business firm the logo so I've put this at the top of the 'maincontent' div in its own div with a class called 'logo'. This is then followed by an unordered list for the tabs. I've given the tabs a class name of; aye y'all guessed information technology 'tabs'. These will act as our tab menu bar that volition display the different pages of our weblog app.
The pages of our web log app are wrapped inside a div container, which I have given a class of 'tab_container'. Inside this I and so have 4 divs (one for each tab/page). I have given all four of these a class chosen 'tab_content' with each ane having its own class for its position within the page. The offset tab has an extra grade of 'tab1', the 2nd 'tab2', the 3rd 'tab3' etc. These individual course names will exist used to help us identify each tab in the next function of the tutorial when nosotros implement the jQuery.
Step 5: Individual Blog Posts


<div class="tab_container"> <div id="tab1" class="tab_content"> <div class="mail"> <h3><a href="#">Designing For, and As, a Color-Blind Person</a></h3> <span grade="postInfo">by <a href="#">Connor Turnbull</a> on Jul 22nd 2011 with 2 comments</span> <p>Color blindness is a mild disability through which the affected feel a decreased ability to distinguish colors from others. This can be a existent drawback for anyone in the blueprint field since color theory is an integral characteristic in successful design, and a lot of decisions are based on the feeling and emotion derived from...</p> <a class="more" href="#">Read More</a> <span grade="line"></bridge> <a href="#">12 Likes xiv Comments Share</a> <bridge class="line"></span> </div><!--Finish Blog Postal service--> </div><!--End Tab 1-->
The individual blog mail has a class titled "mail" and is situated in the div with the course 'tab1' as this tab will be on the default-landing page. This so contains several anchor and span tags which will allow u.s.a. to exist able to way items such as the appointment and blog author in the native blueish a la facebook. Once this 'mail service' div has been completed we can just re-create and paste it for the rest of the posts. Don't get overboard and clog upwards your lawmaking, proceed it to around iii or 4 as this volition requite u.s. an idea as to how it will look and feel. I've also created a span with the course 'line' which is only a horizontal line that nosotros volition use throughout the app.
Pace 6: Other Page Tabs


Our other Page Tabs are made up mainly of h3, anchor and paragraph tags:
<div id="tab2" class="tab_content"> <h3>About</h3> <p>Webdesigntuts+ is a web log made to house and showcase some of the best web design tutorials and manufactures around. We publish tutorials that not just produce groovy results and interfaces, merely explain the techniques backside them in a friendly, approachable mode.</p> <p>Spider web pattern is a booming manufacture with a lot of competition. We hope that reading Webdesigntuts+ will help our readers learn a few tricks, techniques and tips that they might not accept seen before and help them maximize their creative potential!</p> <p><stiff>Webdesigntuts+ is office of the Tuts+ Network</potent></p> </div><!--End Tab 2 -->
Step 7: The Search Filter


<form activity="" method="get"> <input name="search" class="search" placeholder="Filter webdesigntuts+ posts"> </class>
At the height of the sidebar we accept our site filter search - this is made upward from a elementary form. We will make this operational in the side by side function of the tutorial using jQuery. The form is and then followed past another horizontal line and a span and paragraph text to display our 'likes' count.
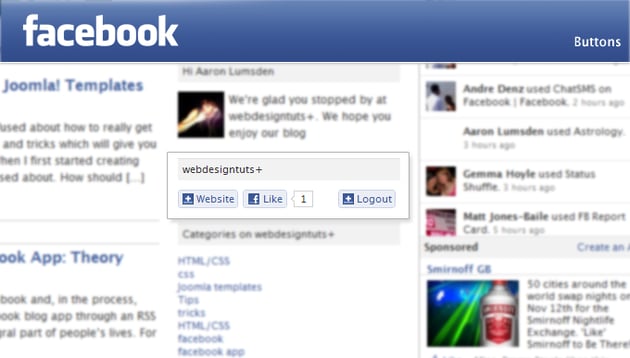
Step eight: Facebook Like and Button
<a class="push left" href="http://webdesign.tutsplus.com/" target="_blank"><span form="buttonimage left"></span>Website</a> <div id="fb-root"></div><script src="http://connect.facebook.cyberspace/en_US/all.js#appId=253432341349745&xfbml=1"></script><fb:similar href="http://apps.facebook.com/fbtuttts"layout="button_count" width="75" show_faces="true" action="like" font="lucida grande"></fb:similar> <a class="button correct" href="#"><bridge class="buttonimage left"></span>Logout</a>
Fortunately for united states of america, Facebook has made it super simple to contain a like button into our app. You can generate the code for your own like button or whatsoever of their other social plug-ins at Facebook Developer Plugins. Once you've generated the code, bring information technology into your html. You lot may want to add some CSS to position it, however in this case it isn't necessary
Stride 9: Tab Headers
<div grade="tabHeader">Categories</div> <ul> <li><a href="#">Sample Cat 1</a></li> <li><a href="#">Sample Cat 2</a></li> <li><a href="#">Sample Cat iii</a></li> <li><a href="#">Sample Cat 4</a></li> <li><a href="#">Sample cat 5</a></li> </ul> <div class="tabHeader">A Little Bit Virtually U.s.</div>
If you take read the first part of this tutorial (if y'all've made it this far I'm guessing you have) then yous'll have heard me talking about reusability. These tab headers define that more than any other function of our code. As with Facebook nosotros are able to reuse these tab headers and implement them with keen ease. They come up in actually handy should yous want to add a quick additional section to the site.
Pace 10: The CSS
Code Block showing tabs headers
At present it'south time to motility onto the styling of our HTML. Due to Facebook's elementary styling there isn't too much CSS. I've cleaved information technology up into parts for you to have a look at. It's besides important to point out at this stage that Facebook tin can be annoying when it comes to testing and tweaking your CSS as it caches it, pregnant that when you upload a new version of your mode sheet it all the same renders the quondam one. Although non perfect; the workaround I used was to add '?version=1' at the end of the included stylesheet in the index file. Every fourth dimension you do an update to the CSS and upload you as well have to update the version number in the index file.
Footstep 11: Setup
We outset the CSS by creating the wrapper and a couple of classes that I e'er add to be able to float items left or right.
/*-----------------------------------------------------------------------------------*/ /* Setup /*-----------------------------------------------------------------------------------*/ .wrapper{ width: 760px; height:200px; margin-left:auto; margin-right:car; padding-top:20px; } .right{ bladder:right; /* A form I e'er add together to float items right */ } .left{ bladder:left; /* To bladder items left*/ } Step 12: Building Blocks
The building blocks for our main content are as follows:
/*-----------------------------------------------------------------------------------*/ /* Setup /*-----------------------------------------------------------------------------------*/ .wrapper{ width: 760px; superlative:200px; margin-left:auto; margin-right:auto; padding-top:20px; } .correct{ float:right; /* A class I always add to bladder items right */ } .left{ float:left; /* To float items left*/ } /*-----------------------------------------------------------------------------------*/ /* Building Blocks /*-----------------------------------------------------------------------------------*/ /*-----------------------------------------------------------------------------------*/ /* Typography /*-----------------------------------------------------------------------------------*/ /*-----------------------------------------------------------------------------------*/ /* Tabs /*-----------------------------------------------------------------------------------*/ /*-----------------------------------------------------------------------------------*/ /* Buttons /*-----------------------------------------------------------------------------------*/ /*-----------------------------------------------------------------------------------*/ /* Extra Components /*-----------------------------------------------------------------------------------*/ Step thirteen: Typography
Probably 1 of the most of import CSS parts of our Facebook app. Get this wrong and information technology will spoil the native effect of your app. Have a await around Facebook and choose the most suitable font sizes for your requirements.
/*-----------------------------------------------------------------------------------*/ /* Typography /*-----------------------------------------------------------------------------------*/ a{ cursor: pointer; color: #3B5998; text-decoration: none; } a:hover{ text-decoration: underline; } stiff{ font-weight:assuming; } em{ font-mode:italic; } h3{ font-size: 16px; font-weight:bold; line-tiptop: i.1em; margin-lesser:5px; } .postInfo{ display:cake; /* Spans are inline chemical element so needs to exist inverse to block in order for the margin to work */ colour:#808080; margin-tiptop:5px; margin-bottom:10px; } p{ font-size: 12px; line-summit: i.5em; margin-bottom:18px; } .line{ display:cake; width:100%; height:1px; background-color:#ccc; margin-acme:5px; margin-bottom:5px; } .more than{ color:#3B5998; font-weight:assuming; } .likesCount{ font-size:16px; font-weight:assuming; } Step 14: Tabs
/*-----------------------------------------------------------------------------------*/ /* Tabs /*-----------------------------------------------------------------------------------*/ ul.tabs { margin: 0; padding: 0; float: left; list-manner: none; height: 19px; /*--Set peak of tabs--*/ border-lesser: 1px solid #E2E2E2; border-left: 1px solid #E2E2E2; width: 100%; margin-bottom:20px; } ul.tabs li { float: left; margin: 0; padding: 0; tiptop: 18px; /*--Minus 1px from the height of ul--*/ line-pinnacle: 18px; /*--aligns text inside the tab--*/ border: 1px solid #E2E2E2; margin-bottom: -1px; /*--Pull the listing item down 1px--*/ overflow: hidden; position: relative; background: #f2f2f2; margin-right:5px; min-width:73px; text-align:centre; } ul.tabs li:get-go-child{ /*--Removes the left edge from the get-go child of the list--*/ edge-left:none; } ul.tabs li a { text-decoration: none; colour: #333333; display: cake; font-size: 11px; padding-right:5px; padding-left:5px; outline: none; } ul.tabs li a:hover { background: #fff; } html ul.tabs li.agile, html ul.tabs li.active a:hover { /*--Makes sure that the active tab does not heed to the hover properties--*/ groundwork: #fff; border-bottom: 1px solid #fff; colour:#3B5998; } ul.tabs li.agile a{ colour:#3B5998; } Stride fifteen: Buttons


Another integral role of the CSS for Facebook apps is the buttons. I'm certain you'll want to use a few of these around your apps. We've created these non using a push, merely instead an anchor tag with a bridge class inside it for the image.
/*-----------------------------------------------------------------------------------*/ /* Buttons /*-----------------------------------------------------------------------------------*/ .push button{ groundwork-color:#ECEEF5; border:1px solid #CAD4E7; text-decoration:none; -webkit-border-radius: 3px; -moz-border-radius: 3px; border-radius: 3px; padding: 2px 3px 2px 2px; margin-correct:5px; } .push button:hover{ border:1px solid #9DACCE; text-decoration:none; } .buttonimage{ groundwork:url(../images/icon.png); colour: #3B5998; display: block; width:12px; peak:12px; margin-right:3px; margin-top:1px; margin-bottom:1px; margin-left:2px; } Pace 16: Extra Components
/*-----------------------------------------------------------------------------------*/ /* Extra Components /*-----------------------------------------------------------------------------------*/ .logo{ width:379px; acme:60px; margin-left:auto; margin-right:automobile; margin-bottom:26px; position: relative; -moz-box-shadow: 0 14px 10px -12px rgba(0,0,0,0.seven); -webkit-box-shadow: 0 14px 10px -12px rgba(0,0,0,0.7); box-shadow: 0 14px 10px -12px rgba(0,0,0,0.7); } .search{ padding: 1px 5px 2px 0; margin-bottom:20px; width:240px; -webkit-box-sizing: edge-box; /* Safari/Chrome, other WebKit */ -moz-box-sizing: border-box; /* Firefox, other Gecko */ box-sizing: border-box; /* Opera/IE 8+ */ } .tabHeader{ groundwork-colour: #F2F2F2; edge-top: solid 1px #E2E2E2; padding: 4px 5px 5px; margin-top:15px; margin-bottom:10px; } .profileimage{ float:left; margin-right: 5px; } Conclusion...
Then there we have it, we now have our Facebook app coded upward into HTML/CSS. I hope you enjoyed reading this role of the tutorial and that you lot now have a great understanding on how Facebook's styles can be translated into CSS. Past looking at and using a few of Facebook's CSS backdrop we really are able to understand how just a few lines of lawmaking in the correct places can give our app that native look and experience, which will sit comfortably within Facebook and adhere to Facebook'due south design principles.
In the side by side part of the tutorial we'll be learning how to implement this into Facebook to be a native blog app. We'll be doing this using YQL and the Facebook Graph API. I'll too be showing yous a few hints and tips for spicing up your app with some sweet jQuery goodness. So until the next part, happy coding peeps!
Further Links & Resource
Source: https://webdesign.tutsplus.com/articles/design-and-code-an-integrated-facebook-app-html-css--webdesign-4378
0 Response to "What App Has Diffrent Colors and Art in Your Comment Box on Facebook"
Post a Comment